Out Of The Darkness Of A Tunnel
This post has been a long time coming, for a number of reasons.
First of all, the shoot in question was shrouded in secrecy, with only those directly involved having any clue just what sneaky shenanigans were afoot. Add to this the fact that none of us could say a word about our activities until the results went live, and it was bound to be a waiting game.
Secondly, in between personal and work commitments (and nature conspiring to give me various forms of lurgy), my fingers haven’t made it to the keyboard until now. But I am here now, so…
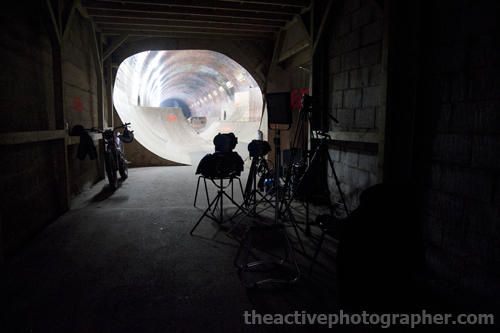
Way back at the end of March, myself and a crew of 13 others got together for two rather long days, with the aim of producing a short video and a set of images showing 2010 Junior World Trials Champion Jack Challoner doing his thing in a disused Victorian railway tunnel (converted by Nike into an amazing BMX park).
To say the least, it wasn’t glamorous. House lighting for the place was fluorescent tubing and its power relied on us running generators for 90% of the time. There was no ventilation, other than at one end of the tunnel where the main doors were, so we had to take regular breaks to step outside for fresh air. As if it needed pointing out, the blue smoke filling the roof space should have been clue enough!
Oh, and there was also a fair bit of dust – but that was easily sorted with some attention from a stiff brush at the outset.
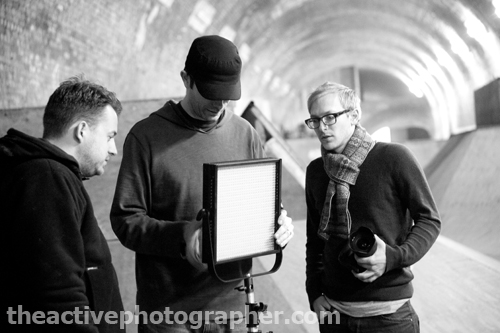
Day 1 was all about the video. Not really my area, given that I’m a stills man, so this fell to the talents of Mr Ross Casswell. Shot exclusively on a Nikon D3S fitted with an assortment of Nikkor lenses, the results were undeniably impressive. Of course, lighting was always going to play a key role in such a dark location, and for this reason we relied on a mix of set-ups, including high-powered LED light panels for nice, clean, neutrally balanced results.
For behind-the-scenes imagery, this kind of lighting was actually ideal. I simply pushed my D3 all the way up to ISO 3200-6400 and was able to hand-hold for all shots ranging from the deepest, darkest depths of 10mm for sweeping wide-angles, right the way up to 200mm telephoto for tidy head shots at the other end of the spectrum.
Interestingly, I tried out Matt‘s 70-200mm VR Nikkor lens for some of the long lens pictures. After just a few minutes, I handed it straight back to him as I found the results less pleasing than those produced by my battered and bruised old 80-200mm AF-S. This is no criticism of the VR lens (without question, it’s a great piece of kit), but it just goes to show that not every piece of equipment suits everyone’s shooting style. That said, I’d be interested to give it another go in more ‘normal’ conditions, if you’re reading, Matt.
So, the resulting short film was subsequently posted up on YouTube and touted around the various trials websites, associated forums and interwebs in general. To save you searching, take a look for yourself, below, then we’ll get to the stills:
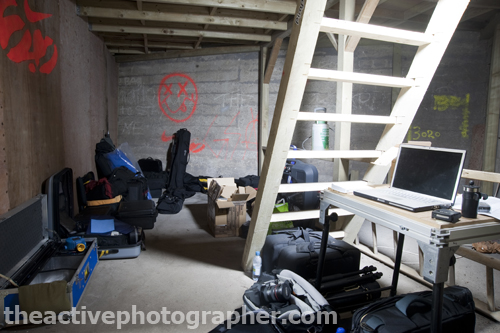
Onwards, to Day 2… and oh, so much kit!
Enough to fill a number of cars. Enough to make people shudder at the thought of just what they’d taken on by getting involved with this shoot. Enough, actually, to make sure we had all bases covered. You know, it’s hard to magic-up additional lighting stands, extra batteries and different lenses out of thin air when you’re miles from base, somewhere down a dirt track.
The key issue for us to consider was lighting. Isn’t it ever?! With such fast paced movement as a trials bike, flash was always going to be top of our list – not only to freeze the action (fast shutter speed + flash light = action stopped dead), but also to create depth and ambiance in the tunnel which, let’s face it, was pretty dark and dingy throughout. Sure, we had plenty of continuous light available to us in the form of Arri, Interfit and other assorted lamps, but this called for something a little more high-tech. Enter wireless technology…
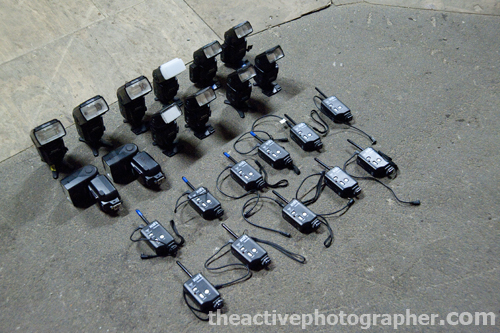
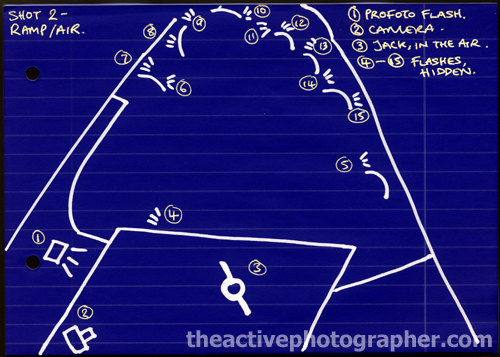
… in the form of portable flash coupled to Pocket Wizard transceivers (which allow these units to be remotely triggered at ranges up to 1600 feet). 12 Nikon SB-800 and SB-900 flashes (pictured below) were used for the background (ie the tunnel) and a single Profoto head was fired at the subject (Jack).
Not that we required it on this occasion, but it’s worth noting that Pocket Wizard tranceivers can also be used to remotely trigger cameras as well.
Anyway, back to the action – and a case in point that not all shoots require vast quantities of pictures to be shot. On this occasion, we essentially picked three spots within the tunnel, to make three ‘final’ photographs; a few test shots here and there meant we explored all the best angles and image elements (composition, shadows falling on walls etc), coming to a quick decision about where we wanted to set up lighting stands and place the camera.
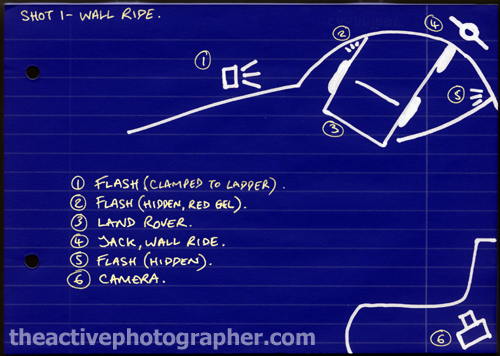
Here’s a Mythbusters-esque setup sketch for the first shot:
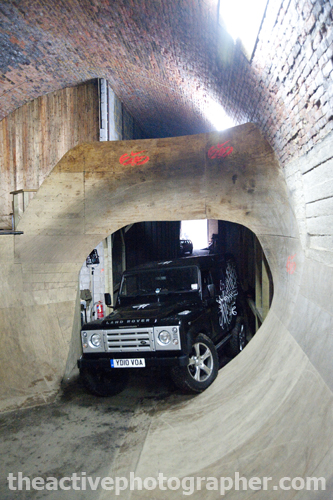
And here is how it relates to the scene we had in front of us, as seen from the final camera position (6) on a ramp platform:
You might think that the sketch makes this shot look pretty simple – and of course, in many ways, it is. However, the final image is only the tip of the iceberg, as they say; the reality was more like 85% planning, 5% test shots, 10% ‘final’ photography.
So, we used 3 lights in total, essentially dialling out the ambient levels in order to create the desired mood. This also meant we could set a fast enough shutter speed to freeze the action. For those of you who want to know the secret, the formula is simple: shutter controls ambient light, aperture controls subject brightness (according to flash output) – and this is what I keep in mind each and every time I set up a picture.
Once we’d worked out the depth of field required to get everything nice and sharp, a single SB-800 was all it took to light Jack and create a nice shadow on the wall. The other two flashes, dialled down to a lower power ratio, acted together in order to separate the car from the background and, dare I say it, the red gel added some sense of drama in otherwise dead space.
The second shot was far more technically involved, requiring a whole raft of speedlights set out at intervals down the length of the tunnel. Here’s what it looked like, Mythbuster-style:
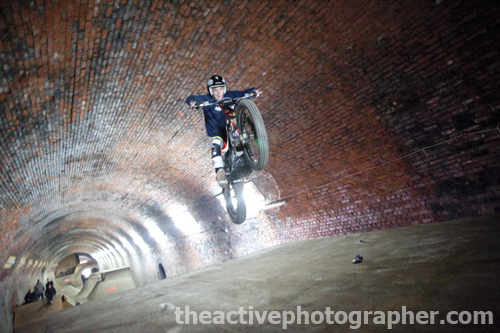
… and here’s a quick test we did, without any of the Speedlights in place in the background.
Here, the aim was simply to work out the best position showing Jack flying through the air, thinking about where the shadow would fall on the wall to the right of the frame and to ensure, once again, that there was plenty of sharpness to cover the range of space our subject would fill.
Note the rubbish in the foreground and the burnt-out strip lights behind Jack; both were taken care of in the moments before the final picture was created – not in post production after the event, as some might immediately think to do!
So there you have it, the anatomy of another action shoot.
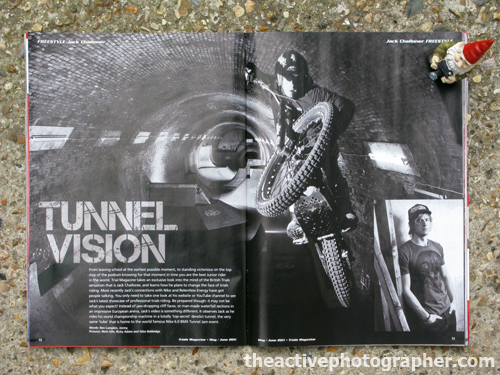
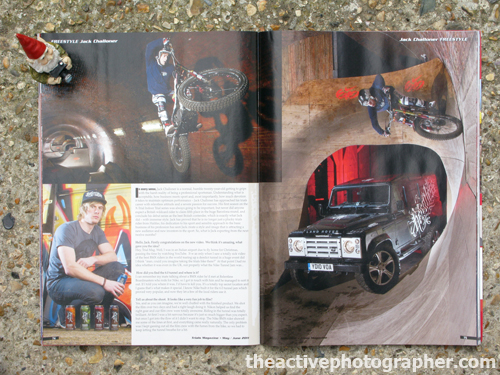
But what of the final pictures? Well, they have been published far and wide, both as part of Relentless Energy Drink‘s publicity activities (Relentless sponsor Jack) and for the self-promotion of those involved. There’s also been additional press coverage, both in trade and trials bike publications.
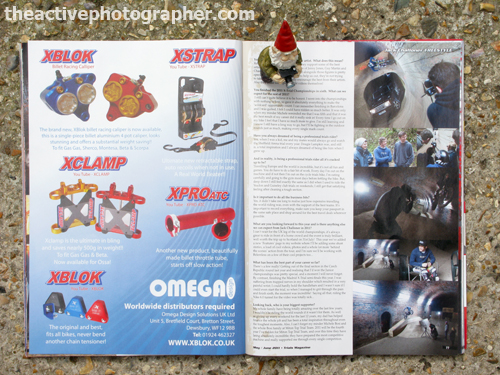
By way of rounding off this post, here’s the spread that appeared in the May/June edition of Trial Magazine:
… and finally, last but not least, a big shout out to the team who helped make this a reality – Ross Casswell, Sam Edmonds, Matt Saxey, Matt Sills, Steve Stringer, Steve Lampkin, Ben Marvin, Bryony Dillamore, Charles Marsden, Brooke Challoner, Jack Challoner and Ben Lampkin who, in a stroke of inspired genius, orchestrated the whole event and really did make make it happen.
Category: Location photography, Technique



Well done Giles! Excellent read and background on the technical aspect
Thanks, Will – glad you liked it :)
Brilliant. The lens is yours anytime you need/want it. Nice gnome work.
Ta very much! I just might take you up on that offer… oh, and I thought the gnome idea was quite inspired ;)
Great write up and great pics
Thanks very much, Chris – it was a great shoot, and I’m glad you like the resulting pictures :)
I’m an avid extreme sports fan and I just had an “eyegasm” seeing these superb works of art. The top-notch technical detail also made me appreciate photography even more. Is it too late if I start shooting pictures now? I am going on 28 with no experience. What do you think?
Thanks very much for the comment – I’m glad you liked the pictures!
Of course, it’s never too late to learn – just don’t get too bogged down with the equipment side of things. All you need is one camera, one lens and a whole load of enthusiasm in order to begin practising the key skills and techniques of photography. Good luck!
Hey Giles
Great article and good to see what you have been up to . The final article looks great and I love the pictures. Great lighting insight sketches too .. Done on the galaxy note ?
Hi Glenn,
Thanks for the kind words, as always.
The lighting sketches were done the traditional way – by hand, using a black Sharpie on yellow paper. Once scanned, the resulting images was then inverted – essentially giving blue ‘negatives’