Gotta Love A Drybag
If you’ve been following my exploits for any amount of time, you’ll know that I love drybags.
They’re sometimes known as roll-tops or drysacks, and I often describe them collectively as my one outdoor ‘fetish item’. And before the sniggering begins, you can leave your dirty thoughts at the door – the word ‘fetish’ here refers to ‘any object, idea, etc., eliciting unquestioning reverence, respect, or devotion’!
So what’s all the fuss about?
Well… Experience has proven to me that preparation and attention to detail should never be taken too lightly when heading outdoors, whether this is with or without camera in hand. Sometimes you know exactly what to expect, other times there’s no way of knowing what lies ahead. But always, you can guarantee that the element of chance will strike just when you least expect (or want) it.
When it comes to protecting my kit from the elements, dry bags are often my go-to item. Most typically I’ll use them to store drinking bottles/flasks/food, camera accessories and clothing within my rucksack. Because they’re waterproof, I can guarantee the contents will stay nice and dry; by default, this also means any spillages are kept contained, too.
There are two reasons why I rate these products so highly. Firstly, they are by far and away one of the most practical bits of outdoor kit you could ever own; secondly, they’re inexpensive and easy to get hold of.
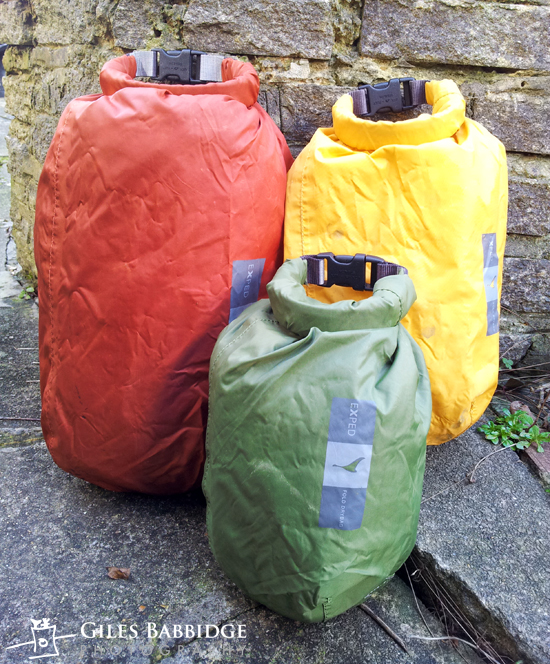
We are treated to many versions of the humble drybag on the market now – including ones with straps, so they essentially act like backpacks – but it’s the simplest design which I use most often. These fit neatly into my rucksack, allowing their contents to nestle comfortably in the space available.
I’ve found the most practical sizes are those ranging between 1 and 40 litres. The larger models make excellent rucksack liners, whilst the mid-range bags even double-up nicely as pillows when filled with clothes on camping trips. Weight-saving and practical, too!
But what of their design?
A simple quick-release buckle on the top and a grab handle on the bottom is about as technical as it gets in real-world user terms. Realistically, this means quick access and the ability to clip the bag to other kit (for example, securing to a bike pannier). Many’s the time you’ll also find mine hanging from a tree branch when out and about in woodland, too.
Okay, so there is no padding in the standard drybag – but this is not the point. If you really want increased protection for your gear, you can always get around the issue.
Ultimately, the success of the drybag’s closing mechanism (and therefore water-tightness) relies upon the user’s competence – several twists of the reinforced strip along the top should be enough to create the necessary seal. Like I say, the design offers really quick access – perfect when the weather is less than favourable.
Another great advantage is that these bags weigh next to nothing and fold up nice and compact when stored. For this reason, I’ll regularly throw a spare one in my bag, just in case.
I often like to colour-code my kit, too. For example, at a glance I will know that red bag = dry clothes, green bag = camera accessories, etc. This is particularly handy when asking others (eg. assistants) to grab stuff out of my bag for me.
If you are yet to discover the wonders of the drybag, I’d suggest you take a trip to your favourite outdoor retailer and pick one up soon. You won’t regret it.
I’ve lost count of the times these useful little bags have saved me (ie my photo/outdoor gear) whilst on location and I would never dream of taking them off my standard kit list. They are invaluable.
In related news: I’ll be publishing a Test/Review featuring some brand new Aquapac drybags in the coming weeks – so keep your eye on the website for updates!
Category: Location photography, Technique

