The Making Of A Camp Fire & Tent Shot
So, I know a lot of you are fans of the glowing tent effect, whereby a photographer will show his/her shelter nestled within the landscape, nicely lit in a way that makes it really stand out.
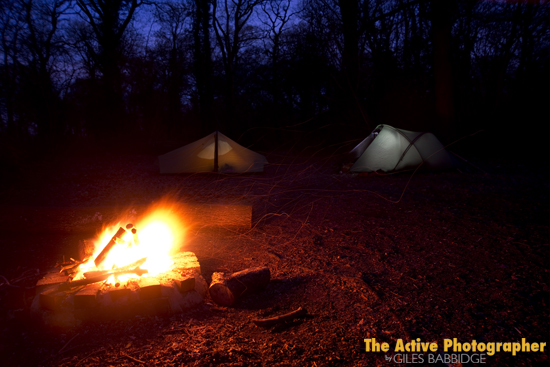
On a recent camping trip, to check out a potential location for this year’s TAP Jolly events, I took a few minutes to shoot an illustrative shot of a couple of tents in close proximity to a roaring camp fire. All said and done, this picture is now being used variously to promote the Jolly – and if you choose to join me, you could well find yourself replicating it alongside fellow photo/outdoor enthusiasts!
Ok, shameless plug over, let’s get on with the how-to.
First up, the gear considerations.
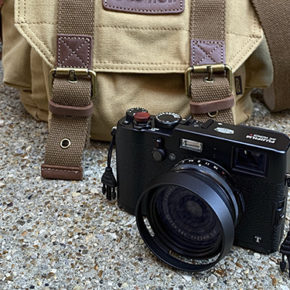
This was actually simplicity itself – one camera (Nikon D800), one lens (24-85mm), a tripod, a shutter release cable, two tents and three light sources (two head torches and the fire). Oh, and if you want to think laterally, a down-filled jacket and gloves were fine additions for ensuring I stayed warm during my long, dark exposures!
Let’s set the scene first. With the tents in position well before the ambient light disappeared, it was time to get the fire burning. This was no great hardship and actually quite good fun – we took advantage of the process, toasting marshmallows as an accompaniment to the odd swig of whisky (well, it was setting up to be a cold night… -1˚, feeling like -5˚ with the wind chill taken into account!).
One of the things you quickly come to realise with night time photography is that the natural daylight fades a lot quicker than you might think; every 5 minutes or so, it’s worth re-evaluating the scene and making mental compensations ahead of releasing the shutter.
Now, a great many of these glowing tent shots that we see involve epic, mountainous views. Which is great, but on this occasion I was camping in the woodland… which gave me another decision to make.
Woodlands are pretty dark places once the light goes (not much ambient makes its way through the canopy once the sun drops below the horizon), so thoughtful framing was important in order to make the most of what light remained. Shooting at a focal length of 24mm, the camera was mounted on the tripod in a way that would position the fire at the bottom left of the picture; I wanted to lead the eye into the frame, towards the tents and then that lovely, rich blue sky.
Composition sorted and focus locked on the foreground (make sure you switch to manual for this), it was time to begin making exposures.
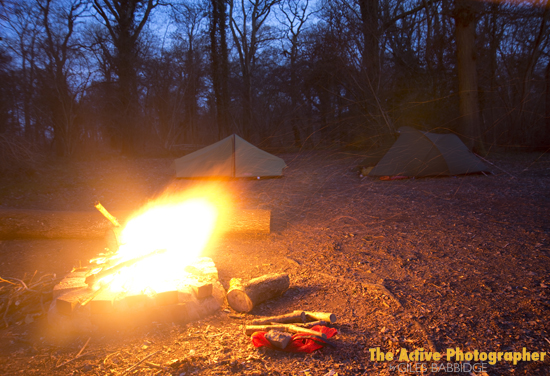
So, beginning with what you might call an ‘educated guess’ of a 30-second exposure time at f/5.6 and ISO 100, I wanted to see how the scene looked as a whole.
Why did I choose f/5.6? Two reasons – firstly, to keep the exposure times relative short (10s of seconds rather then minutes) and secondly, the throw the background slightly out of focus, thus concentrating the viewers’ eyes immediately on the fire.
Here’s the result:
Not a bad start. I liked the overall composition (notice how sparks from the fire are recorded as wispy trails, blowing into frame) but several things were apparent:
1. The picture was too bright, especially the sky.
2. Such a long exposure had created too much flare coming off the fire; it had also burned-out the flames completely.
3. The red bag which had contained some logs was clearly visible (oops!) so needed to be removed.
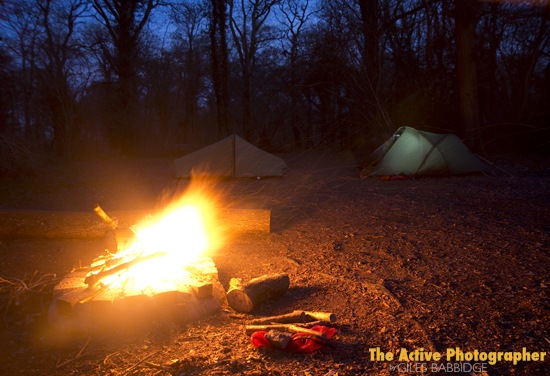
Next step, then, was to reduce the exposure time – and my rule of thumb is always to either double or halve the value, depending on requirements. It was the latter in this case, which gave me 15 seconds at f/5.6.
You’ll notice that I also introduced one additional light source at this point – one head torch was placed in the right-hand tent, switched on in a position which would give the most favourable throw of light. It’s worth noting that by angling the light downwards, you’re less likely to suffer ‘burnout’ of your tent in these long exposures.
So what did I now see? Well, the image was less bright overall, and the sky had darkened down nicely – much closer to what I was after. Still some flare from the fire, and the flames were still burning out, but look at the tent in the background – it balanced up nicely with the sky and the fire, which told me what I could expect in the next, ‘final’ shot (see top of article).
Remember what I said before about the daylight fading quickly? Well, in all, the time between first and third image was just 9 minutes!
Knowing how quickly the light was disappearing, I could rely on several factors for the final shot:
1. The shadow areas would be blocking out, giving nice, rich black areas.
2. The glow of the tents (I introduced a 2nd torch for the other tent) would be accentuated in the lower light levels.
3. The warmth of the light coming off the fire, lighting the ground and log behind, would also be lovely and punchy – and those wispy sparks would stand out more.
What I was aiming for in my ‘camp fire and tent’ picture was to depict the atmospheric location, expressing a warm and cosy feel at the site. I think the image delivers this, but only because I had a clear idea of the final result in my mind well before darkness fell.
This technique is such a great way of visually showing the mood of your nights around the camp fire. And there are many variations – from star trails to painting with light. But at the end of the day, you’ve just got to get out there are try it!
Related: The Active Photographer Jolly events – which give you the chance to try this for yourself, with me on hand to talk you through every step of the way!
Category: Camping, Location photography, Night photography, Technique

