Many of you reading this are avid enthusiast photographers; some may even be aspiring professionals. For a great majority though, either because of my publicised activities or your own, you will be very familiar with Focus On Imaging – Europe’s largest annual imaging show, held at Birmingham’s National Exhibition Centre.
I have a long personal association with the show (if the archived collection of show guides is anything to go by!), and have been a returning visitor for many years. I’ve built up a great number of industry contacts as a result, many of whom now offer me – and therefore The Active Photographer audience – great access and insight via, among other things, podcast recordings made live at the show.
Well now… In the latest development along these lines, I was recently invited exclusively to shoot behind-the-scenes at the production of the first of next year’s Focus press ads.
Ok, so picture the scene.
The premise behind the ad itself is simple enough – “Miss it and miss out!” say Matt Sills, campaign photographer. “If you’re not at Focus, you will miss out on all the latest that the industry has to offer. Visiting the show gives you the best access to the most up-to-date kit and a chance to rub shoulders with some of the best professional photographers in the business”.
The day starts off like many full-scale shoots; a convoy of cars meeting at our chosen studio – on this occasion in Portsmouth, on the UK’s south coast – loaded up with all manner of equipment necessary to create a series of pictures. Although the final image is essentially a one-take affair, a number of other picture elements will later be comp’d together in Photoshop.
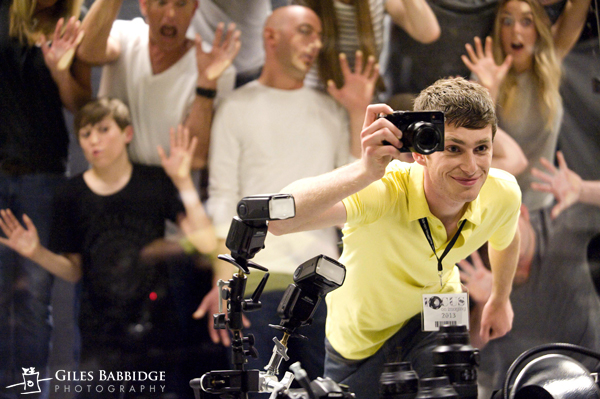
Along with props (photographic kit including flash guns, grip, cases, cameras, lenses and more), a large sheet of Perspex (or Plexiglass, to our American chums) has already been delivered and awaits its starring role as the ‘window’ against which our supporting cast of characters will be pressing. The human element of the ad (main subject and background characters) will turn up later in the afternoon; before that comes the set assembly and lighting tests.
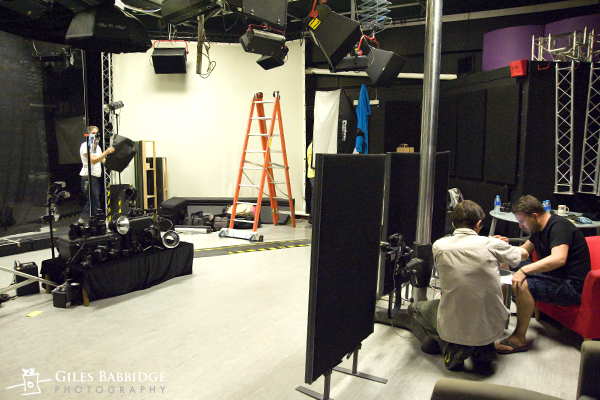
Having secured the Perspex vertically using a couple of Manfrotto Auto Pole upright supports, Magic Arms, Super Clamps and a liberal scattering of duct tape, it’s time to arrange those props for some test shots.
Here’s what the set looks like at this point:
Happy with the overall layout, perspective and positioning, the grand task of lighting begins – using the crew as stand-in subjects.
Many of you will have a sound understanding of lighting technique, I’m sure, but for those not in the know, you’d probably be surprised at just what’s involved when illuminating even the simplest of sets.
As is often the way, it’s the planning which takes the most time – not the capture of the ‘final’ picture itself. Long before our subjects arrive, there’s plenty to think about – mostly adjustment and re-adjustment as the various lights are moved into position.
Also, special consideration is needed for our backdrop – it’s reflective, of course, but nothing we can’t take care of with a couple of snazzy tricks. The use of a polarizing filter on the lens is the first step to dampening and removing those reflections, supported by carefully controlling the angle at which lights stike the surface of the Perspex. Added to this, we’ve positioned a cunning anti-glare screen at the camera position, to minimise all reflections from that area of the studio.
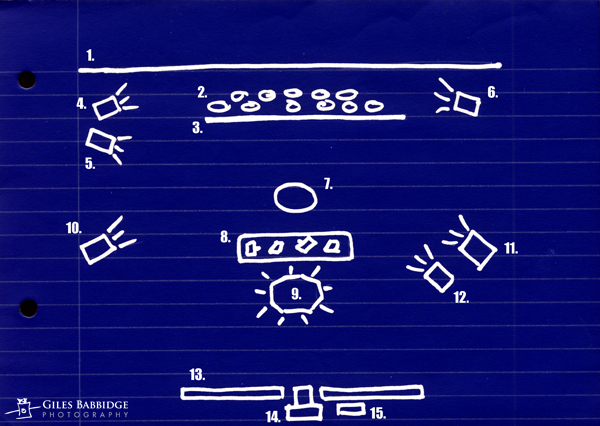
On this occasion, a total of seven lights are used (ranging between Profoto studio heads and Nikon speedlights). Positioned variously on stands, clamps and VALs (voice-activated light-stands, ie handheld by people), a good few hours pass as ratios are calculated via multiple test shots. By far the easiest way to do this is to build up the ambiance one light at a time; once one is correct, it’s turned off whilst the next is sorted.
Here’s how it looks from above:
1. Black backdrop material – 2. Background subjects – 3. Perspex – 4. Light: background subjects rim light – 5. Light: main subject rim light – 6. Light: background subjects rim light – 7. Main subject – 8. Props on raised platform – 9. Light: overhead prop rim light – 10. Background subjects main light – 11. Background subjects main light – 12. Main subject main light – 13. Anti-reflection screen – 14. Camera – 15. Computer
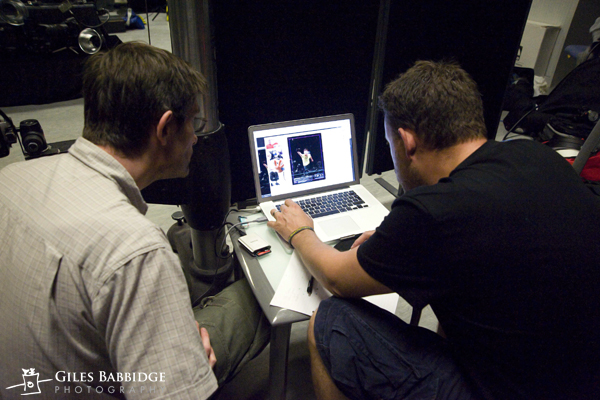
With the firmly-secured camera (Nikon D3 + 24 -70mm) tethered to a Macbook for instant feedback, the process is simple enough and really helps speed things along. Each light has its own considerations – for example, we have to make sure that those flashes lighting everyone behind the Perspex are not spilling over in a forward direction, creating flare. Black foil is used to act as a ‘gobo’ here, and is malleable enough to help direct light where it needs to fall.
At this point, an outtake shot is sent to Mary Walker (the lady behind Focus On Imaging). Due to other commitments, she can’t be with us on this occasion, but it’s important to keep her informed of progress.
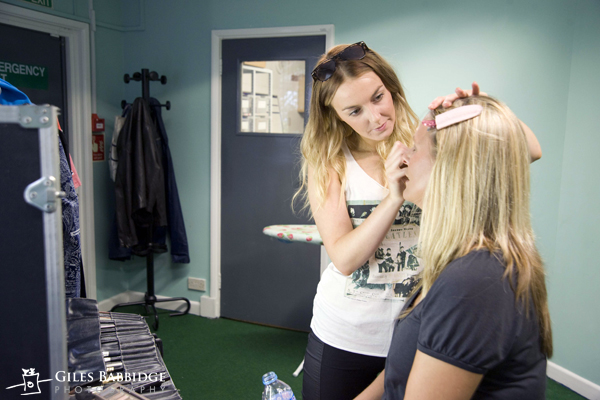
Now our subjects begin to arrive and individually make their way to the Green Room for makeup treatment – everyone, not just our female subjects, get attended to – making sure that their skin doesn’t present too much glare when subjected to our lights. We’ve also laid on a change of clothing for a number of them, having tested various colour combinations beforehand. White/black/grey has been chosen for the ‘onlookers’, with the central subject standing out in a yellow polo shirt.
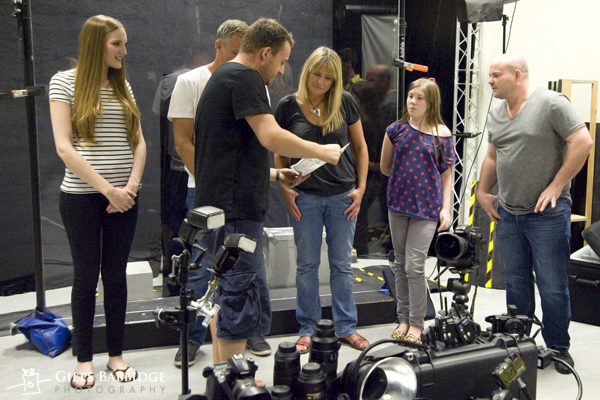
A quick briefing of the ad concept, including a look at some of the visuals, and we’re good to make the first ‘proper’ shots (just as soon as all Model Release forms are completed).
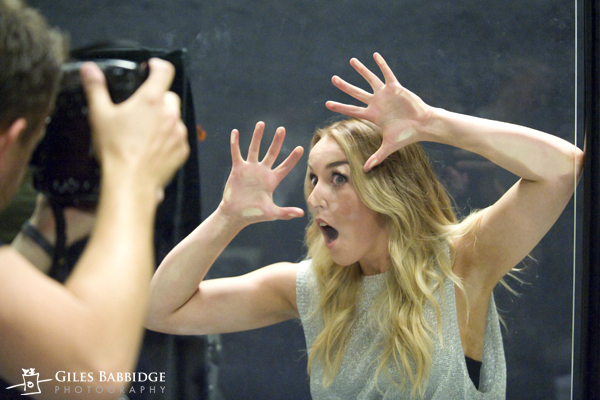
To cover a few bases, a number of our background subjects are also photographed on their own. It’s important to make sure the expressions on all 10 people are just right, so a few additional ‘character’ shots are created – close-up details showing just head and shoulders which can be added to the final ad image in post production. Even a number of the crew get in on the act!
In all, it takes just 1 hour to get all the shots we want and before you know it, our models are on their way and our kit is being packed up.
We’ve had a great day; the studio has been filled with the sound of music and laughter throughout… but that’s not the end of the story for this press ad’s construction.
There now follows the process of preparing the final ad in post production. Working with 5-6 layers, Matt makes sure everything is just right – highlights, shadow areas, overall composition, text and more. In all, it takes him one further day of minor retouching before the first proof can be sent for approval and eventually, 2 days later, the final ad is cleared and signed off for use.
A big thanks have to go out to everyone at Focus and all who helped on the shoot; without you, this shoot couldn’t have happened. Focus On Imaging is always a team effort, and that’s what makes it such a success year after year.
So, you’ll be wanting to see the finished result, right? Not a problem – hit this link to check it out right now!
Look out, too, for additional articles between now and next year, in which I’ll be bringing you more exclusive content in the build-up and after-show weeks!

